Before we begin:
1Password Vault ~= TeamPassword Group.
Attachments cannot be exported from 1Password with the export tool, or imported with TeamPassword's import tool. Attachments must be manually uploaded to TeamPassword after the migration is complete.
The 1Password CSV export does not include:
- Security questions
- Linked items
- Linked apps
- Custom fields (including security questions and 2FA backup codes).
These should be manually moved into TeamPassword after everything else is migrated - most things can go into the Notes field.
1. Export from 1Password
You cannot export your data from the 1Password web page or extension. You must download the 1Password desktop application in order to export your data.
Download the app for your device here: https://1password.com/downloads
Log in, then follow 1Password's export instructions, which change based on the device you are using.
Here are basic instructions to export from the 1Password desktop app:
- Windows: Click the ellipsis (three dots) at the top of the sidebar > Export, and click the account you want to export.
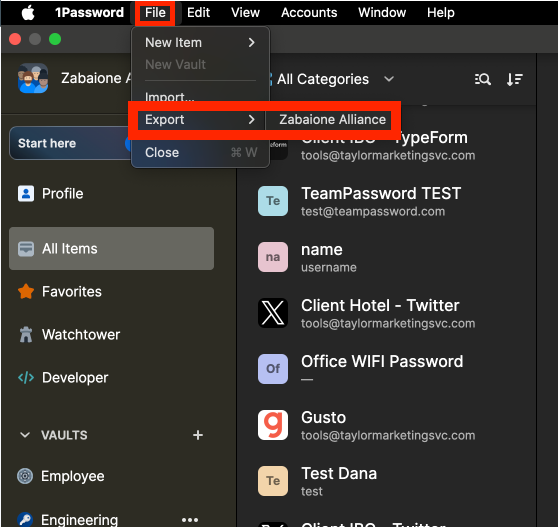
- Mac: go to File > Export in the menu bar and choose the account you want to export.
Select CSV as the format.
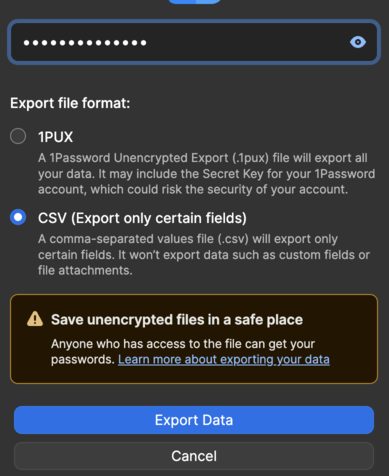
Click Export Data.
NOTE: 1Password does not create columns for the vaults your items were in. It dumps all your items into the CSV without differentiating which vaults they came from. If this is problematic for you, there is a workaround, albeit laborious:
- Use Travel Mode to temporarily remove all but the vault that you'd like to export (done in the admin dashboard): Use Travel Mode to remove vaults from your devices when you travel
- Use the 1Password desktop app to export data to a CSV: How to export your data from the 1Password desktop app
- Confirm that the CSV file only contains data from the vault that you'd like to export and share.
- Repeat the process from step 1 for the next vault.
Now that you have your 1Password export CSV, open it in Excel or Sheets and get the TeamPassword import template.
Here's a video on doing the Travel Mode trick: https://www.youtube.com/watch?v=0JiiCPziCCI
2. (Option A) Import directly into TeamPassword if Groups/Vaults are not needed
If you do not need to import your data into separate Groups/Vaults, then the fastest way to import your data into TeamPassword is as follows. Otherwise, jump ahead to part 2. (Option B) of this article.
From your TeamPassword home dashboard:
- Click your avatar in the top right
- Under Manage Teams, click the name of your organization
- In the left-hand menu, click Import Records
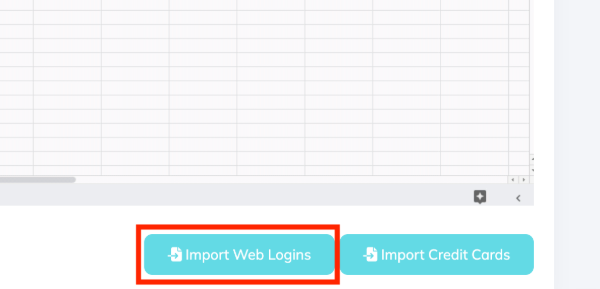
Scroll down and click Import Web Logins, then click Next Step.
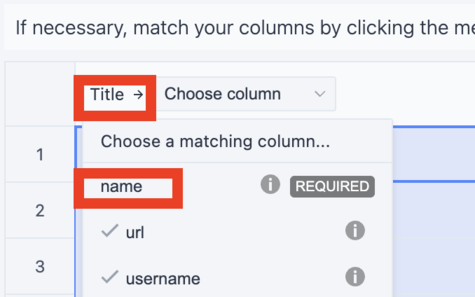
Upload your 1Password CSV. A number of columns must be manually matched or skipped.
For Title, choose name.
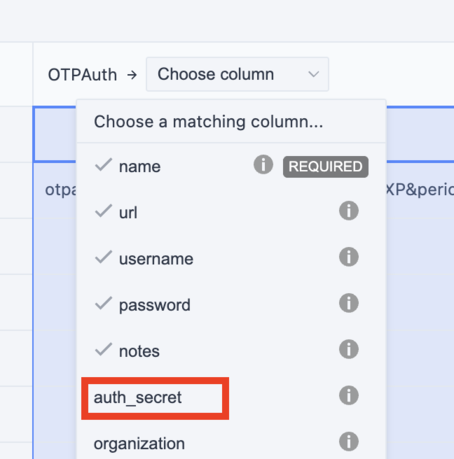
OTPAuth --> auth_secret.
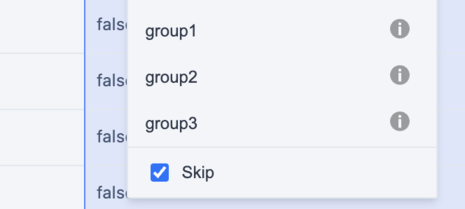
For Favorite, Archived, and Tags, scroll down and tick Skip.
Click Next, review that everything looks good, and click Import Data.
2. (Option B) Download TeamPassword import template
From your TeamPassword home dashboard:
- Click your avatar in the top right
- Under Manage Teams, click the name of your organization
- In the left-hand menu, click Import Records
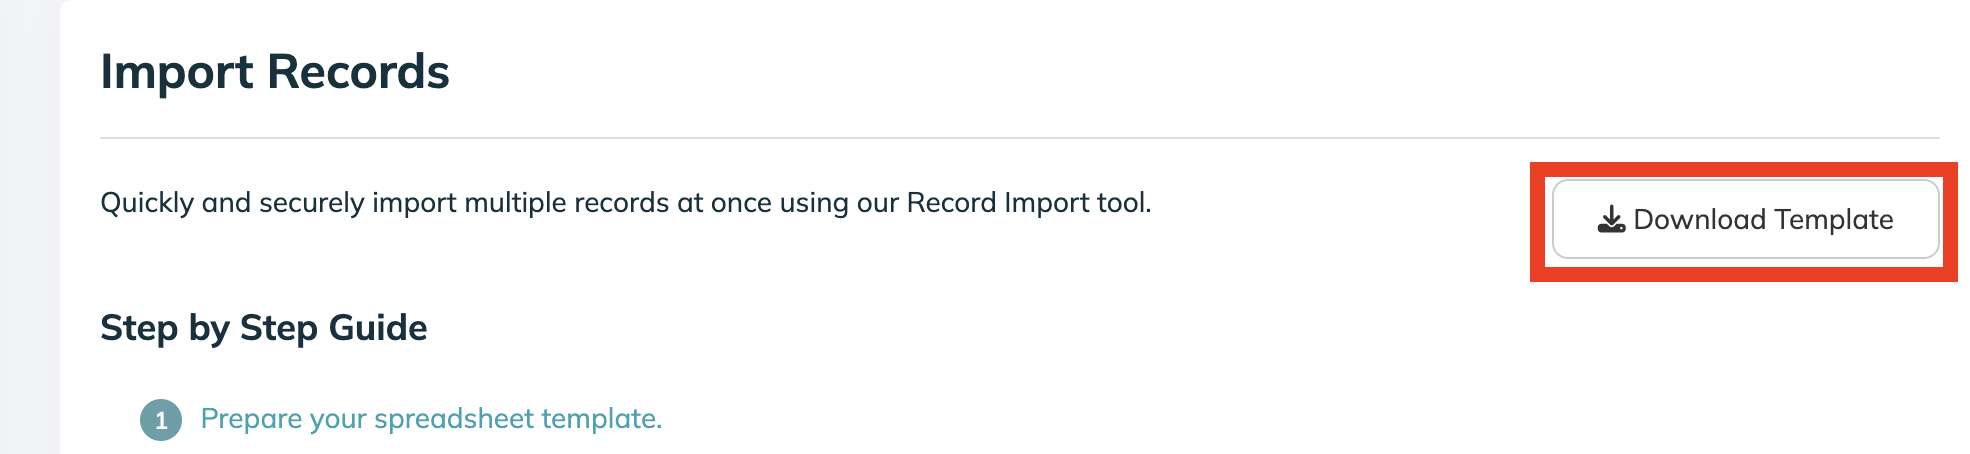
Open this template CSV in a new tab or page of Excel or Google Sheets:

At this point, read the import guide! Especially Step 3: Format Your CSV.
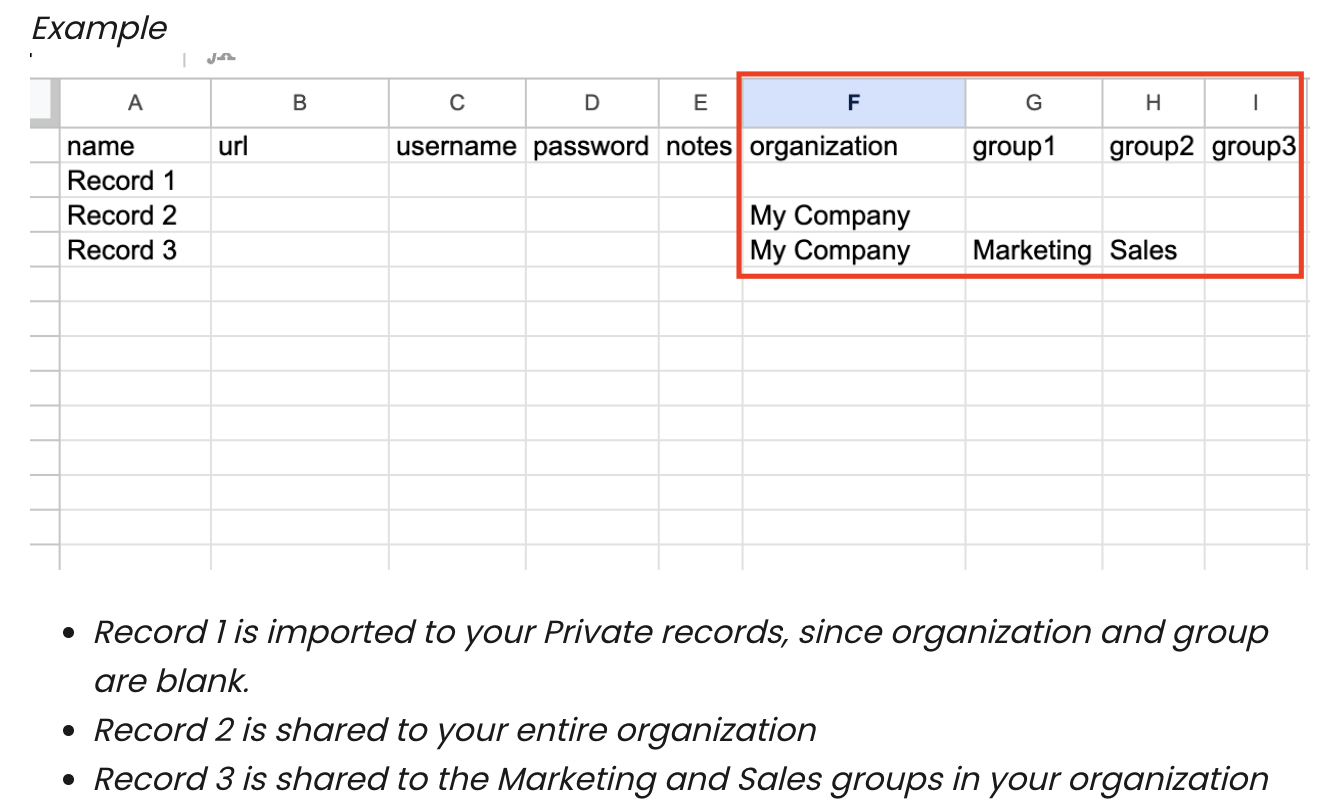
During the import process, each record can be added to up to three different groups. Later, within the TeamPassword app, you can add a record to as many groups as you want.
If the organization and group(s) columns are left blank (columns G, H, I, and J in the above screenshot), the record is imported into your Private vault.
3. Move data from 1Password to TeamPassword
Now copy your data from the 1Password export CSV into the appropriate column of the TeamPassword import template:
- Title > name
- Url > url
- Username > username
- Password > password
- OTPAuth > auth_secret
- most other data and notes > notes
Favorite, Archived, and Tags can be ignored, since these are not supported fields in TeamPassword (TeamPassword does have Favorites, but this cannot be marked during import).
Once your data is moved into the TeamPassword import template, download it as a CSV.
On the TeamPassword import page, scroll down and click Import Web Logins, then click Next Step.
Ensure all the columns are matched appropriately and that the data looks good. If needed, reference the instructions under 3: Import the CSV.
When ready, click Import Data.
If you have any questions, please reach out to our team: https://teampassword.com/support